Custom shirt design is more than just a trend—it’s a way to showcase your creativity, support a cause, or simply make a unique fashion statement. Whether you’re looking to design a shirt for a special event, a business, or just for yourself, learning the ins and outs of shirt creation can be both fun and rewarding. In this guide, we’ll break down the process step by step, from picking the right design tools to choosing the best materials and printing techniques.
How to Design Your Own Shirts: A Step-by-Step Guide
Introduction to Custom Shirt Design
The world of custom shirt design has exploded in popularity over the past decade, transforming from a niche hobby into a massive global industry. Whether you’re an artist, entrepreneur, or just someone who loves to stand out, designing your own shirts has never been more accessible. With the right tools and a bit of know-how, anyone can bring their ideas to life on fabric.
One of the biggest reasons for this boom is the growth in the custom t-shirt printing market. “The global custom t-shirt printing market size was valued at USD 5.16 billion in 2024 and is expected to grow at a CAGR of 11.5% from 2025 to 2030.” This means there’s a huge demand for custom shirts, making it an exciting space for both creators and consumers.
From bold graphic tees to subtle embroidered designs, there are countless ways to express yourself through custom apparel. No matter your style or skill level, this guide will walk you through the essentials of designing shirts that stand out and last.
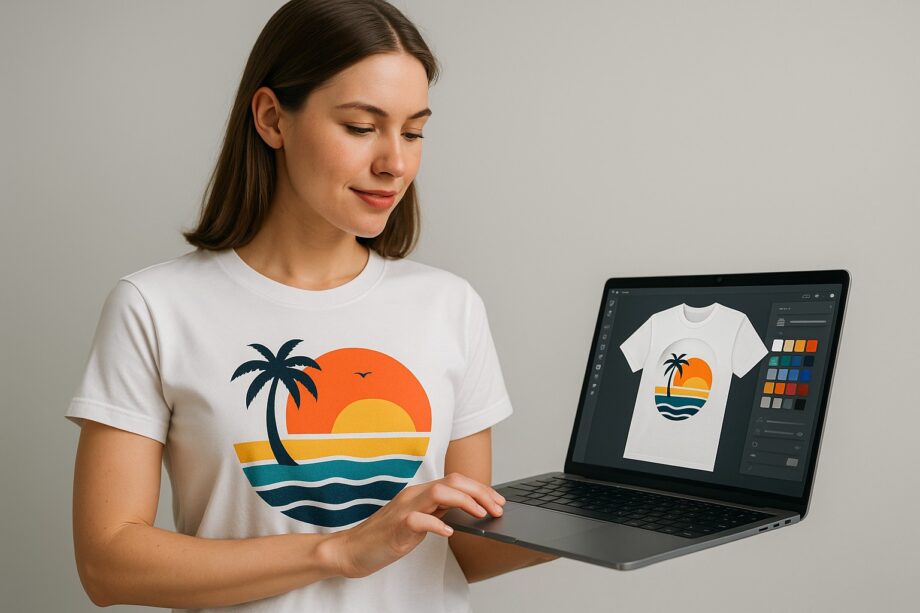
Choosing the Right Design Tools
The first step to designing your own shirts is picking the right tools for the job. Thankfully, you don’t have to be a professional artist or graphic designer to create something amazing. With today’s technology, there are plenty of options for beginners and experienced designers alike.
Most people start with digital design software. Popular choices include:
- Adobe Illustrator: Perfect for creating vector graphics that scale well on any shirt size.
- Adobe Photoshop: Great for photo-based designs or intricate artwork that requires detailed editing.
- Canva: User-friendly and web-based, this tool is ideal for those who want to skip the learning curve but still create eye-catching designs.
- Procreate: Popular among iPad users, especially those who love to draw freehand.
Don’t overlook online design platforms dedicated to shirt creation. Sites like https://www.thisshirtexists.com offer easy-to-use customization tools, templates, and previews so you can see exactly how your design will look on a shirt before ordering.
When choosing a tool, consider your comfort level, the complexity of your design, and whether you need features like layering, transparency, or vector art. Remember, the tool you use should make the process easier, not harder, so don’t be afraid to experiment until you find what feels right.
Understanding Printing Techniques
Once you’ve got your design, the next major decision is how you’ll get it onto a shirt. There are several printing techniques to choose from, each with its own pros and cons. Knowing the differences can help you pick the best method for your design, budget, and expected order volume.
- Screen Printing: This is the traditional go-to for custom shirts, especially for bulk orders. It’s known for its durability and vibrant colors. “The screen-printing segment held the highest revenue share of 56% in 2024.” Screen printing works best for simple designs with limited colors, since each color requires a separate screen.
- Digital Printing (Direct to Garment, or DTG): Digital printing is perfect for complex, multi-color designs or photos. It prints directly onto the fabric, allowing for detailed images and gradients. “The digital printing segment is expected to emerge as the fastest-growing segment, registering a CAGR of 12.5% from 2025 to 2030.“
- Heat Transfer: This method uses heat to transfer your design onto the shirt, often using vinyl or transfer paper. It’s versatile and cost-effective for small runs, but might not be as durable as screen printing or DTG for frequent washing.
- Embroidery: For a premium look, embroidery stitches your design directly onto the fabric. It’s perfect for logos or text, especially on polos or hats, but can be more expensive and isn’t ideal for intricate graphics.
Your choice of printing technique will depend on your design complexity, budget, shirt material, and how many shirts you need. For large events or simple logos, screen printing is usually the best bet. For one-off pieces with lots of detail, digital printing or heat transfer might make more sense. Don’t forget to check with your printer about color matching and fabric compatibility before placing a big order.
It’s also interesting to note the global trends in custom shirt printing. “The Asia Pacific region dominated the global custom t-shirt printing market, accounting for over 39.4% of the global revenue share in 2024.” This means many of the latest innovations and styles are coming from this region, influencing trends worldwide.
Selecting Quality Materials
The fabric you choose is just as important as your design. After all, even the coolest print won’t last long if the shirt falls apart after a few washes. When selecting your shirt, think about comfort, durability, and how the material will interact with your chosen printing technique.
Here are some of the most popular materials for custom shirts:
- 100% Cotton: Soft, breathable, and ideal for most printing methods. Cotton shirts are comfortable for everyday wear and hold color well.
- Cotton-Polyester Blends: These blends are more resistant to shrinking and wrinkling than pure cotton and often feel softer. They can be a great choice for athletic or casual shirts.
- Tri-Blends: Made from a mix of cotton, polyester, and rayon, tri-blends offer a vintage look and feel. They’re lightweight and drape nicely, but may not be ideal for all printing techniques.
- Performance Fabrics: If you’re designing shirts for sports or outdoor activities, look for moisture-wicking or technical fabrics. These are designed to keep you cool and dry.
Consider the fit and style too—do you want a classic unisex tee, a fitted cut, or something oversized? The right shirt will make your design pop and keep people coming back for more. Always ask for a sample or check sizing charts before placing a large order, especially if you’re selling your shirts online.
Step-by-Step Guide to Designing Your Shirt
Ready to get started? Here’s a practical, step-by-step guide to taking your shirt idea from concept to closet:
-
Brainstorm Your Idea:
Think about your purpose—are you designing for a brand, event, or personal use? Sketch out rough concepts on paper or digitally. Gather inspiration from fashion trends, art, or favorite quotes.
-
Choose Your Design Tool:
Select a design tool that matches your skill level and desired outcome. For beginners, online platforms with built-in templates are a great starting point. More advanced users might prefer graphic design software.
-
Create the Design:
Start working on your design, keeping in mind the limitations of your chosen printing method. Use high-resolution images and pay attention to color contrast and placement—your design should look good from a distance and up close.
-
Select a Shirt and Printing Method:
Match your design to the right shirt material and printing technique. For example, screen printing works great on cotton for bold, simple graphics, while DTG printing is perfect for detailed, colorful images on blends.
-
Preview and Adjust:
Most online platforms (like https://www.thisshirtexists.com) let you preview your design on a digital mockup. Make adjustments to placement, size, or color as needed. Don’t rush this step—it’s easier to fix mistakes now than after printing.
-
Order a Sample:
If you’re planning a big run or selling shirts, always order a sample first. This lets you check the print quality, fabric feel, and fit before committing to a full order.
-
Finalize Your Order:
Once you’re happy with your sample, place your full order. Be clear about sizes, quantities, and any special instructions for the printer.
-
Promote or Enjoy:
If you’re selling your shirts, take high-quality photos and start promoting them online. If you’re making shirts for yourself or an event, get ready to show off your creation!
By following these steps, you’ll avoid common pitfalls and end up with a custom shirt you’re proud to wear or share.
Tips for Successful Custom Shirt Design
Even with the best tools and materials, a little insider knowledge can take your shirt design to the next level. Here are some tips to help you succeed:
- Keep it Simple: Bold, simple designs often stand out more than overly complicated ones—especially from a distance.
- Test Your Colors: Remember that colors on a screen can look very different on fabric. Always order a sample if color accuracy is important to you.
- Think About the Audience: Consider who will wear your shirt. Is it for a specific group, age range, or interest? Tailor your design accordingly.
- Check Trends and Inspiration: Stay up to date with what’s popular in the custom shirt world, but don’t be afraid to add your unique twist.
- Plan for Growth: If you’re thinking about starting a shirt business, keep in mind: “The U.S. custom t-shirt printing market size was valued at USD 857.5 million in 2023 and is projected to grow at a CAGR of 11.8% from 2024 to 2030.“
With these tips in mind, you’re ready to dive into the world of custom shirt design. Whether you’re making one shirt or a hundred, enjoy the process and wear your creativity with pride!
